How to set up the Dependency Dropdown block
In short
The Dependency Dropdown block adds linked dropdowns to checkout: each choice filters the options in the next one. Add the block (listed as Dependent Dropdowns), create one column per level and one row per complete path, or use Import CSV. Choose a Storage Mode, save, and place the block. By default all levels are required, and checkout won't continue until each has a value.
Category
Custom Fields
Plan
Advanced & Deluxe
Where it shows
Shopify checkout
Saves to order
Attribute or metafield
✓ Applies to
- Advanced and Deluxe plans
- Shopify Plus checkout
- Any checkout position: body, after the header, or around the delivery address
✕ Doesn't apply to
- A single independent list. Use the Dropdown block
- Options that change with stock or delivery availability. The lists are fixed data you enter
What the Dependency Dropdown block does
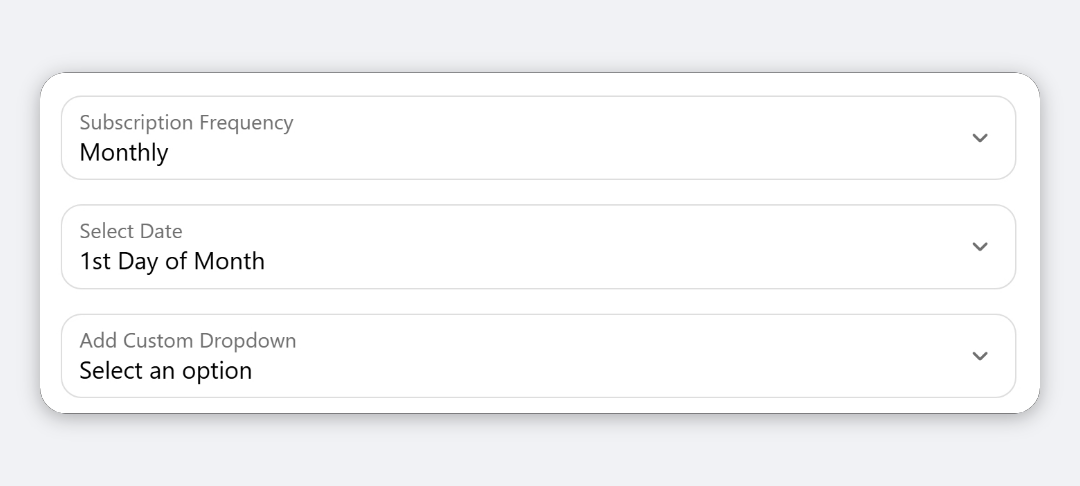
The block shows one dropdown per level, for example State, City and Town. Only the first is active at the start. When the buyer picks a state, the City list fills with the cities under that state, and so on down. Changing a level clears the levels below it. The choices are saved to the cart and carry through to the order. When the levels are required, checkout won’t continue until all of them have a value.
When to use it
- Capture a location your shipping form doesn’t, such as State → District → Town.
- Route click-and-collect, such as Region → Store.
- Narrow a product or service choice, such as Category → Subcategory.
Before you start
- Prepare your data as full paths. Each row is one complete path from the first level to the last. A spreadsheet works well: one column per level, then export it as CSV.
- Allow the app to block checkout progress. Required levels only stop checkout if the Custom Block app block is allowed to block checkout progress in Shopify’s checkout editor.
Set it up
- In Checkout Ninja, go to Blocks and click Create New Block. Then click Start Fresh, or open an existing block you want to add it to.
- Click Add block and choose Dependent Dropdowns.
- Under Dropdown Data, rename the columns (Level 1, Level 2, Level 3 by default) to the labels buyers should see, such as State, City, Town. Use the Column button to add a level, or remove one you don’t need.
- Click Add Row and fill in one complete path per row. Or click Import CSV to upload or paste your data.
- Set All Fields Required and edit the Validation Error Message if you like.
- Choose a Storage Mode: Combined (Single JSON field) or Separate (Each level in its own field).
- For Combined mode, under Where to store the value, choose Attribute and enter Name of the attribute, or choose Metafield and enter a Namespace and Key.
- Click Done. Check that Status is Active, then click Save and copy the Block ID.
- Click Open Checkout Editor. Add the Custom Block app block, paste the Block ID, allow it to block checkout progress, and save.
Import and export CSV
- Import CSV opens a window where you can upload a
.csvfile or paste CSV text under Or paste CSV data. Click Import. The first row becomes the column names. Importing replaces all current columns and rows. - Export CSV shows your data as CSV. Click Download CSV to save
dependent-dropdown.csv, or Copy to Clipboard.
A valid CSV looks like this:
State,City,Town
California,Los Angeles,Hollywood
California,Los Angeles,Downtown
California,San Francisco,Mission
Values containing a comma must be wrapped in double quotes. Column names must be filled in and unique (ignoring case), or the import shows an error.
Settings reference
| Setting | What it does | Default |
|---|---|---|
| Dropdown Data | Columns (one per dropdown level, used as its label) and rows (one per complete path). Up to 10 columns and 1,000 rows. | 3 columns, no rows |
| All Fields Required | Yes blocks checkout until every level has a value, and marks each dropdown as required. | Yes |
| Validation Error Message | Shown when checkout is blocked because a level is empty. | Please complete all dropdown selections |
| Storage Mode | How the choices are saved. See below. | Combined (Single JSON field) |
Storage Mode
| Mode | What’s saved |
|---|---|
| Combined (Single JSON field) | One value in the place set under Where to store the value, as JSON keyed by level. For example {"state":"California","city":"Los Angeles","town":"Hollywood"}. If no name is set, it’s saved as the dependent_dropdown attribute. |
| Separate (Each level in its own field) | One attribute per level, named after its column in lower case with spaces as underscores. State is saved as state, Delivery Region as delivery_region. Always attributes; Where to store the value is ignored. |
Where to store the value (Combined mode)
| Setting | What it does | Default |
|---|---|---|
| Attribute → Name of the attribute | Name of the attribute that holds the JSON. | dependent_dropdown |
| Metafield → Namespace and Key | Saves the JSON as a cart metafield, written as namespace.key. | None |
Verify it worked
- Open your checkout. One dropdown shows per column. Only the first is active, with Select an option as the placeholder.
- Pick a value in the first level. The next level fills with only the matching options.
- Leave the last level empty and try to continue. Checkout stops with your Validation Error Message.
- Complete every level and place a test order.
- Open the order in Orders and look under Additional details. In Combined mode you’ll see one entry with the JSON. In Separate mode you’ll see one entry per level, such as
state,cityandtown.
Limitations
- Shopify Plus only for placement in the checkout steps. That’s a Shopify rule for all checkout apps.
- Separate mode always saves attributes, and the attribute names come from your column names. Renaming a column changes the attribute name on future orders.
- In Separate mode, column names like Email or Note could clash with attributes other apps use. Pick specific names.
- Option labels and saved values are the same text. You can’t show one label and save a different code.
- Options are fixed data. They don’t react to stock, dates or the delivery address.
Troubleshooting
The block doesn’t show in checkout. The block hides itself if Dropdown Data has no columns. Open the block, check the columns and rows, and save again. Then run through the general checklist.
The second dropdown is empty. The rows don’t contain a path starting with the value picked above. Check spelling and spaces: Los Angeles and Los angeles are different values.
Buyers can continue with empty levels. Check All Fields Required is Yes and that the Custom Block app block is allowed to block checkout progress in the checkout editor.
The import shows an error. Every column needs a name, and names must be unique. Make sure the first row of your CSV is the header row.
Want to see this block in a live checkout first? See examples and use cases →
Frequently asked
How do I import a large list of options? +
Click Import CSV, then upload a CSV file or paste CSV text. The first row holds the column names (one per dropdown level), and each following row is one complete path, such as California,Los Angeles,Hollywood. Importing replaces the current data.
What's the difference between Combined and Separate storage? +
Combined saves every level in one field as JSON, such as a single dependent_dropdown attribute. Separate saves each level as its own attribute, named after its column in lower case with spaces turned into underscores.
Does it block checkout? +
Yes, when All Fields Required is Yes (the default). Checkout stops with your Validation Error Message until every level has a value.
How many levels and rows can I add? +
Up to 10 columns and 1,000 rows in the editor.