How to set up the Payment Icon block
In short
The Payment Icon block shows a row of payment method logos in checkout, under an optional title such as We Accept. Add the Payment Icon block, add one row per method under Payment Icons and pick it from the list, save, and place the block in the checkout editor. You choose the icons yourself; they don't update from your payment settings.
Category
Trust & Security
Plan
Advanced & Deluxe
Where it shows
Shopify checkout
Setup
No code, ~5 minutes
✓ Applies to
- Advanced and Deluxe plans
- Shopify Plus checkout
- Any checkout position: body, after the header, or around the delivery address
✕ Doesn't apply to
- Detecting which payment methods your store has enabled. You pick the icons by hand
- Custom logos. Only the icons in the list are available
- Thank-you and order status pages
What the Payment Icon block does
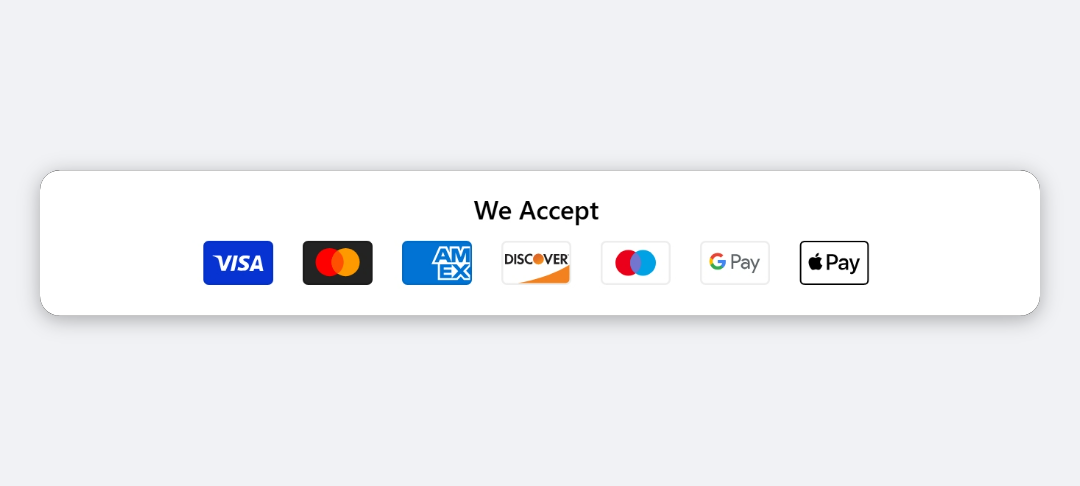
The block shows a line of payment method logos, such as Visa, Mastercard, PayPal and Klarna, under an optional title like “We Accept”. The logos are Shopify’s own payment icons, in their brand colours. They’re display only: they don’t change which payment methods the buyer can use.
When to use it
- Show accepted methods before the payment step, so buyers know early that they can pay their preferred way.
- Highlight buy-now-pay-later options such as Klarna, Afterpay or Affirm on higher-priced carts.
- Surface local methods like iDEAL or Bancontact for buyers in a specific country, using visibility conditions.
Before you start
- List the payment methods your store actually offers. The block doesn’t check your payment settings, so only add icons for methods buyers can use.
Set it up
- In Checkout Ninja, go to Blocks and click Create New Block. Then click Start Fresh, or open an existing block you want to add it to.
- Click Add block and choose Payment Icon.
- Under Title, edit the Title Text, or clear it to show the icons without a title.
- Under Payment Icons, add a row and choose a method in Payment Method Icon. Repeat for each method, in the order you want them shown.
- Set Alignment and Icon Spacing.
- Click Done. Check that Status is Active, then click Save and copy the Block ID.
- Click Open Checkout Editor. Add the Custom Block app block where you want the icons. Paste the Block ID and save.
To centre or move the title, use Alignment under the title’s Advanced Options. The title’s own alignment is set to Center by default, and it takes priority over the separate Title Alignment setting.
Settings reference
Title
| Setting | What it does | Default |
|---|---|---|
| Title Text | Optional line above the icons. Leave empty to hide it. | We Accept |
| Advanced Options → Size | Extra Small, Small, Medium, Large or Extra Large. Only Small and Extra Small change how it looks. | Medium |
| Advanced Options → Bold | Shows the title in bold. | On |
| Advanced Options → Color | Default (Black), Accent (Blue), Subdued (Gray), Success (Green), Warning (Yellow), Critical (Red), Info (Blue) or Decorative. | Default (Black) |
| Advanced Options → Alignment | Left, Center or Right. | Center |
| Title Alignment | Left, Center or Right. Used only when the title has no alignment of its own under Advanced Options. | Center |
Icons
| Setting | What it does | Default |
|---|---|---|
| Payment Icons → Payment Method Icon | One payment method per row, chosen from 400+ icons: cards, wallets, buy-now-pay-later, local bank methods and crypto. | — |
| Alignment | Left, Center or Right placement of the icon row. | Center |
| Icon Spacing | Gap between icons: None, Extra Tight, Tight, Base, Loose or Extra Loose. | Base |
Verify it worked
- Open your checkout with any product in the cart. The title and icons show in the order you added them.
- Check each logo is the brand you picked.
- Remove every icon, save and reload checkout. The whole block, title included, should disappear. Add the icons back.
Limitations
- Shopify Plus only for placement in the checkout steps. That’s a Shopify rule for all checkout apps.
- Manual list. The block doesn’t read your store’s payment settings. Keep it in sync yourself.
- No custom logos. Icons come from Shopify’s payment icon set, so their size and style are set by Shopify.
- Accent (Blue) and Decorative title colours show in your default text colour, and Italic isn’t available.
Troubleshooting
The block doesn’t show in checkout. Check that Payment Icons has at least one row with a method selected. The block hides itself, title included, when there are no icons. Then run through the general checklist.
The title stays centred when I change Title Alignment. Open the title’s Advanced Options and change Alignment there. It overrides Title Alignment.
An icon shows the wrong brand or is blank. Some methods appear more than once in the list under different names. Remove the row and choose another entry for that brand, then check it in checkout.
Want to see this block in a live checkout first? See examples and use cases →
Frequently asked
Does the block show my enabled payment methods automatically? +
No. You pick each icon from the list. When you add or remove a payment method in Shopify, update the block to match.
Can I upload my own payment logo? +
No. The block uses Shopify's payment icons, and you choose from the 400+ in the list. For another logo, use the Trust Badge block with a custom image.
Can I show different icons by country? +
Yes. Create one checkout block per region, each with its own icons, and use a country visibility condition on each.
Why doesn't the block show at all? +
It hides itself when no icons are selected under Payment Icons. Add at least one row and pick a payment method in it.